How I Built the Background Patterns for This Blog
Jan 5, 2026 - ⧖ 9.0 min(2026-07-08 Edit: My blog now uses a lightweight theme with reduced processing. This post is left here as an artifact.)
Overview
My blog features a distinctive background pattern that echoes the monospace style used throughout the site. It was inspired by Nullsoft's website from back in the Winamp days.
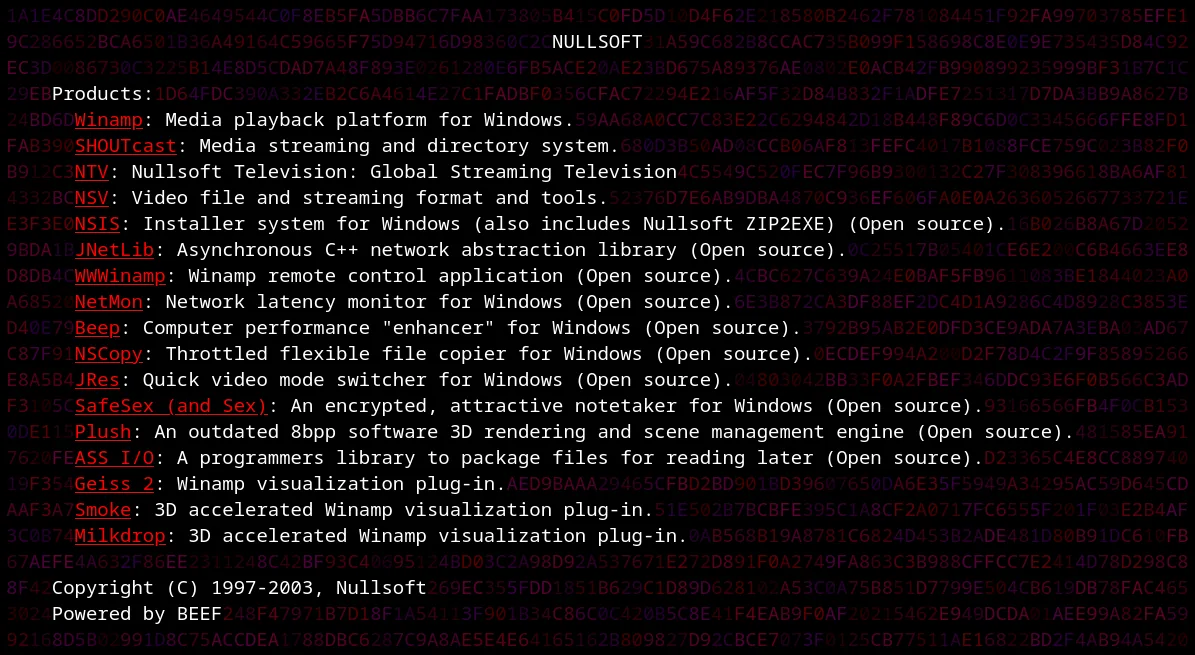
Nullsoft's implementation was simple: a monospace font, a pre block, and a bunch of font tags every two characters. This design predates smartphones though, and having a large pre block doesn't work well on today's screens.
However, after finding The Monospace Web project, I realized it was feasible to replicate Nullsoft's BEEF effect.
Experimenting
I initially just copied the original implementation, spammed font tags in a pre block, and then moved it using position: fixed. However, a LOT of characters can fit on a screen and this was extremely slow.
Next I tried only the pre block without the font tags. The performance on this turns out to be fine and that's what the current implementation uses. However, coloring this would be problematic.
I applied a gradient effect to color the pre block using background-image, but this doesn't result in the random-ish (it looks like some noise pattern or sine wave actually) colors as seen in Nullsoft's site. It was interesting for sure, but not what I was looking for. It just looked like a gradient. Adding transitions and changing the angles also didn't help, and it degraded performance as well.
I eventually figured out that a canvas can be used as a background-image just like with the gradient. To make this work would be a little complex though:
╭──────────── [1] ───────────╮   [1]
│                            │  ABCDE
│ Generate massive pre block │  FGHIJ
│                            │
╰──────────────┬─────────────╯
               │
               │
               ▼
╭──────────── [2] ───────────╮   [2]
│                            │    ↑
│  Calculate character size  │   ←A→
│                            │    ↓
╰──────────────┬─────────────╯
               │
               │
               ▼
╭──────────── [3] ───────────╮   [3]
│                            │  █████
│  Generate colored canvas   │  █████
│                            │
╰──────────────┬─────────────╯
               │
               │
               ▼
╭──────────── [4] ───────────╮   [4]
│                            │  ABCDE
│   Apply it to pre block    │  FGHIJ
│   w/ background-image      │
│                            │
╰──────────────┬─────────────╯
               │
               │
               ▼
╭──────────── [5] ───────────╮   [5]
│                            │   🦙
│    Whip the llama's ass    │
│                            │
╰────────────────────────────╯
The main question is: How do I calculate the exact dimensions of a character so it lines up perfectly with the text? Let's find out how!
Font Metrics: Aligning Pixels with Characters
Before we can create the canvas, we need to know the exact dimensions of a character. The browser provides this information via the TextMetrics object:
function fontMetrics ( font ) {
// Create a canvas
const canvas = document . createElement ( "canvas" );
// We only want it for 2d rendering
const context = canvas . getContext ( "2d" );
// Set the font to whatever is passed in (it's the page font)
context . font = font ;
// Finally get the `TextMetrics` object
const metrics = context . measureText ( "A" );
return metrics ;
} This function creates a temporary canvas and measures the width and bounding box of the character 'A' using the current font. Since it's a monospace font, we can use any character for this.
We can then use the TextMetrics to calculate the dimensions of a character. Note that the object already has the correct width, so we only need to calculate the height.
The height needs to account for line height multipliers, otherwise the pattern will slowly drift and the characters will have two different colors:
function patternPixelHeight ( metrics ) {
const style = window . getComputedStyle ( document . body );
const fontSize = parseFloat ( style . fontSize );
const lineHeightStr = style . lineHeight ;
let lineHeightPx =
lineHeightStr === "normal" ? fontSize * 1.2 : parseFloat ( lineHeightStr );
const lineHeightMultiplier = lineHeightPx / fontSize ;
const fontHeight =
metrics . fontBoundingBoxAscent + metrics . fontBoundingBoxDescent ;
const totalLineHeight = fontSize * lineHeightMultiplier ;
return totalLineHeight ;
} Once we are able to calculate the size of a character, we can move on to generating the canvas.
Noise Generation Logic
For performance reasons, the generated canvas is only 20x20 characters in size and then it gets tiled across the page. In practice, it's nearly impossible to see the tiling because the background characters are chosen at random.
Each theme defines an array of colors and the color is randomly picked from the array while generating the canvas.
Here is how the canvas is generated:
function generateNoise ( themeKey , isDebug = false ) {
const currentFont = getBodyFont ();
const metrics = fontMetrics ( currentFont );
const pixelWidth = patternPixelWidth ( metrics );
const pixelHeight = patternPixelHeight ( metrics );
const canvas = document . createElement ( "canvas" );
// Tile size: 20x20 blocks
canvas . width = pixelWidth * 20 ;
canvas . height = pixelHeight * 20 ;
const ctx = canvas . getContext ( "2d" );
// Get the color palette for the selected theme
const palette = THEMES [ themeKey ]. renderer . config . colors . map (( hex ) => {
const r = parseInt ( hex . slice ( 1 , 3 ), 16 );
const g = parseInt ( hex . slice ( 3 , 5 ), 16 );
const b = parseInt ( hex . slice ( 5 , 7 ), 16 );
return `rgb( ${ r } , ${ g } , ${ b } )` ;
});
let colCount = 0 ;
let rowCount = 0 ;
// Draw loop
for ( let y = 0 ; y < canvas . height ; y += pixelHeight ) {
for ( let x = 0 ; x < canvas . width ; x += pixelWidth ) {
// Debug mode provides visual inspection of the size and position of rectangles
if ( isDebug ) {
ctx . fillStyle = ( colCount + rowCount ) % 2 === 0 ? "#ff00ff" : "#00ffff" ;
} else {
ctx . fillStyle = palette [ Math . floor ( Math . random () * palette . length )];
}
// Create a rect the size of a character
ctx . fillRect ( x , y , pixelWidth , pixelHeight );
colCount ++ ;
}
rowCount ++ ;
colCount = 0 ;
}
// Return the canvas as a data URL so we can use it to color the `pre` block.
return canvas . toDataURL ();
} Theme Integration and Rendering
Themes are defined in the THEMES object, each specifying the characters to use, a color palette, character appearance frequency, and which renderer to use:
const THEMES = {
subtlety : {
chars : "░▒" ,
renderer : {
renderFunction : defaultRandomRender ,
config : {
colors : [ "#343434" ],
frequency : 0.2 ,
},
},
},
// ... other themes
}; I only have two renderers:
- full random
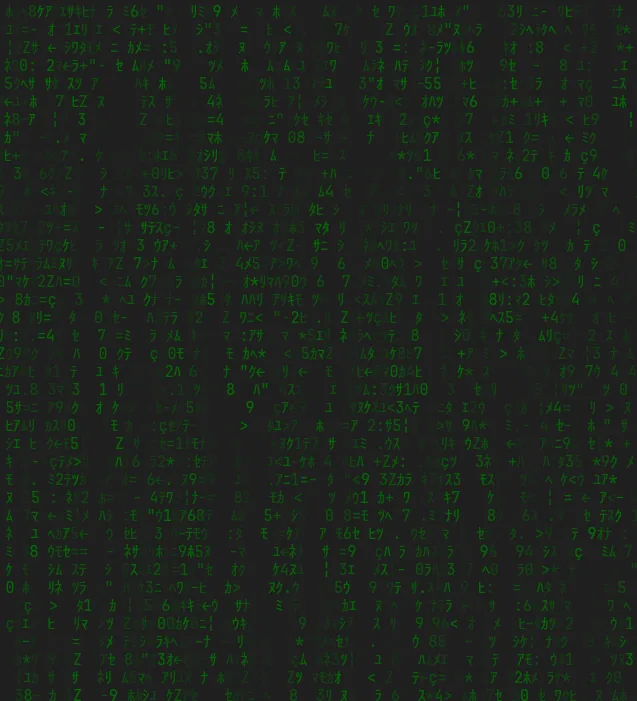
- Neo
The Neo renderer ignores everything I've talked about so far and uses span tags with inline styles. The performance of this is a little slow, but there aren't a ton of characters in the background for the Neo theme like with the others. Although it can be fun to tweak the values:
Conclusion
Putting it all together results in the background you see on this page. Changing the theme causes the giant fixed-position pre block to get re-rendered with the theme's characters, and then the canvas is regenerated and set as the background-image, which is tiled by CSS. If you want to see debug mode and how the canvas is aligned to each character, click here (works best with the B33F theme).